
MODEL INSTRUCTIONS
Vip Pro Jack kit instructions
Connect the induction neckloop to a compatible 3.5 mm audio source. Fit the cell for your selected Vip receiver, check the jack and adapter, then test playback and calls separately.
Before you start
| Control or state | What it does |
|---|---|
| Audio path | 3.5 mm source → short-range induction neckloop → selected induction Vip receiver. |
| Microphone choice | Integrated controls/microphone or the wired-microphone arrangement selected in the order. |
| Listed cable | 1 mm cable; the neckloop does not need charging. |
| Listed receiver power | 337/SR416SW; listed use time up to 4 hours, depending on use. |
| Listed kit | Jack neckloop, selected Vip receiver and two 337/SR416SW cells. |
Check the chosen option and your order’s contents before using or replacing parts. Optional bundles are included only when selected.
Check playback first. If music works but calls fail, check headset-audio and microphone support in the adapter.
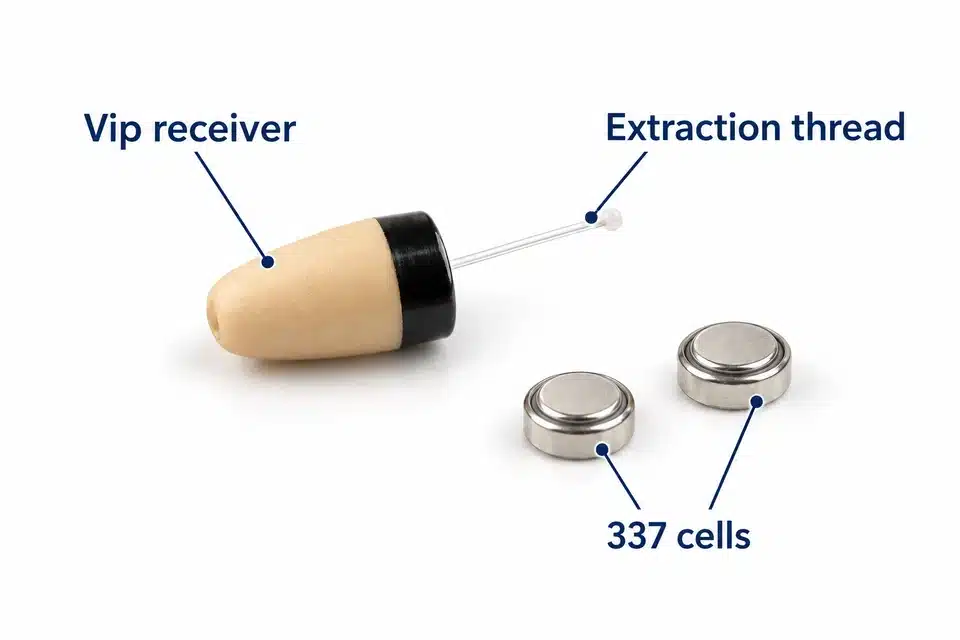
1. Fit the selected receiver cell
- Check that your selected Vip receiver uses a 337/SR416SW cell. MegaMini uses LIR640 and has a separate guide.
- Unscrew the black receiver cap. Fit one cell with the positive, marked side facing up, then refit the cap straight.
- Fit the cell shortly before use. It drains while fitted, even when no audio is playing; remove it after use.
2. Inspect the receiver and plan safe removal
Inspect the receiver outside the ear. Background hiss can occur with an induction receiver; it does not prove that playback or calls work. Test the actual audio path.
Keep the sound opening clear. If it is blocked, ask model support about cleaning; do not probe it with a needle or alter the internal spring.
Do not force a receiver deeper. Keep its retrieval thread accessible and stop if fit or removal is not easy.
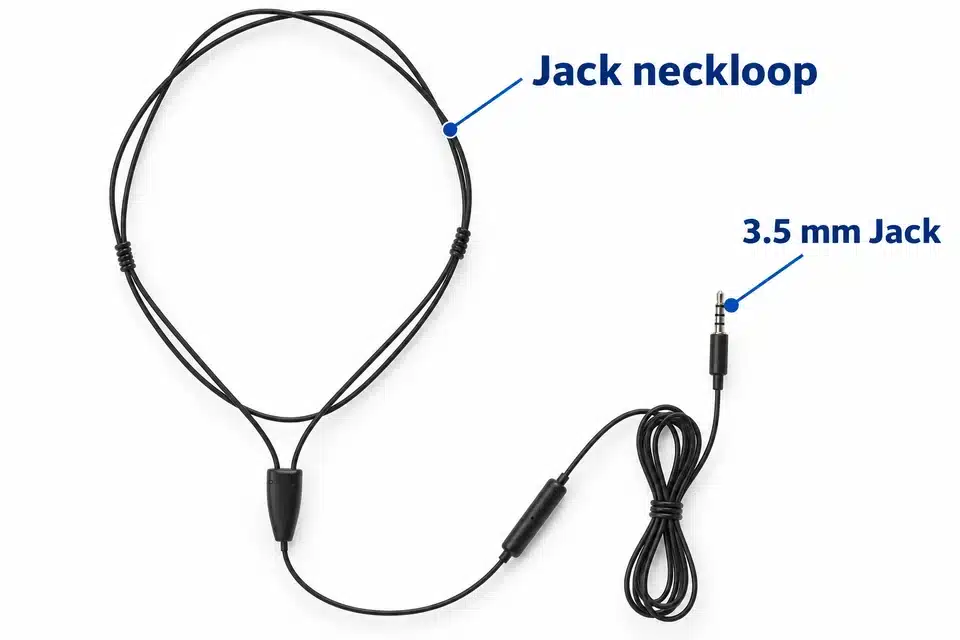
3. Connect the Jack neckloop
- Place the neckloop around your neck: induction is short-range.
- Connect its 3.5 mm plug to the phone or player. Remove a phone case if it obstructs the connector, and check that the plug seats fully without forcing it.
- If an adapter is needed, test it with another headset. Playback alone does not prove that the adapter supports the microphone and calls; some iPhones need the appropriate original adapter.
4. Test playback, then a call
- Play a familiar track and start with low phone volume.
- Check receiver audio with the neckloop in its worn position.
- Make a separate call test. If music works but calls do not, check the adapter and the phone’s call-audio output before changing the receiver.
5. Use the controls for your microphone option
| Control or state | What it does |
|---|---|
| Central button: one click | Answer a call or pause/play recordings. |
| Central button: two clicks | Next recording. |
| Central button: three clicks | Previous recording. |
| + / − | Adjust volume; the connected phone can also control it. |
| Integrated microphone | Behind the central button. The red/green adapter and wired-microphone arrangement do not use these integrated controls. |
| Wired-microphone version | Does not have the same central-button control. Use the phone for call/playback control when required. |
If a button function is unavailable, try the phone’s controls, another playback app or another phone. Adapter support can affect both the buttons and microphone.
6. Finish use and disconnect the cell
- End the call or stop playback, then switch off or disconnect the transmitter as described for this model.
- Use an accessible retrieval thread with your fingers only. If removal is difficult, stop repeated attempts and get medical help.
- Once the receiver is safely out, unscrew its cap and remove the cell. Store the receiver and cell separately.
Fix a failed check
Music works but calls do not
Check the phone’s call-audio output and whether the Jack adapter supports headset audio and the microphone. Music playback alone does not prove call support. Test another suitable adapter or phone if the same check fails.
No audio or low audio
Check the selected receiver cell, positive-side orientation and straight cap. A cell left fitted can be flat even if the kit has not been used.
Test the audio source and the transmitter’s position separately. Restart the source/transmitter and try a known-working cell or another phone when the same check still fails.
Start with low volume. If the receiver makes a loud noise outside the ear, remove the cell and check orientation and cap alignment. Do not bend the internal spring; contact support if it persists.
A button function is unavailable
Use the Jack controls described above, then test the phone’s on-screen controls or another app/phone. Some functions depend on the phone and adapter; the wired-microphone option does not use the same central button.
The microphone is not heard
Keep the documented microphone opening clear. Restart the transmitter/phone and test a call with another phone. For Jack, test the adapter and microphone in the phone’s voice-recording app separately.
Receiver removal is difficult
Use the accessible retrieval thread with your fingers only. Stop if it is not easy to remove; do not keep trying with tweezers or other tools. Get medical help for a retained object, and immediate help for a battery in the ear.
Care and safety
Do not push a receiver deeper or put tools or cotton buds into the ear canal. If removal is difficult, stop repeated attempts and get medical help. Severe pain, bleeding or discharge needs urgent care; a battery in the ear needs immediate help.
Mayo Clinic: ear foreign-object guidance · NHS: earwax advice
Keep the device, cables and adapters dry. If they get wet, unplug safely and allow them to dry fully; do not use an external heat source such as a hairdryer or microwave.
Stop using damaged equipment. Use the supplied or specified power parts, keep cables/adapters indoors and do not handle connected equipment during a thunderstorm.
Use is discouraged with a pacemaker, hearing aid, other electronic medical device or a hearing condition. Seek suitable professional advice before use in those circumstances.
Follow local rules for use, privacy and disposal. This product is not a toy. Ask CooMax for the documentation and warranty terms that apply to your selected product and country.
Get model-specific help
Tell us your selected Vip receiver and microphone option, phone or player, any 3.5 mm adapter and the first check that failed. Include whether playback works and whether call audio and the microphone work. Keep passwords private.
Choose another model’s instructions