
MODEL INSTRUCTIONS
Nano V4 Bluetooth kit instructions
Charge the V4 neckloop and pair T-LOOP when the red and blue lights flash. Keep the built-in microphone uncovered and check the phone’s selected audio output.
Before you start
Nano V4 neckloop with integrated microphone, charging parts and passive Nano receivers.
The first blue light is not pairing mode. Continue holding A until red and blue flash rapidly.
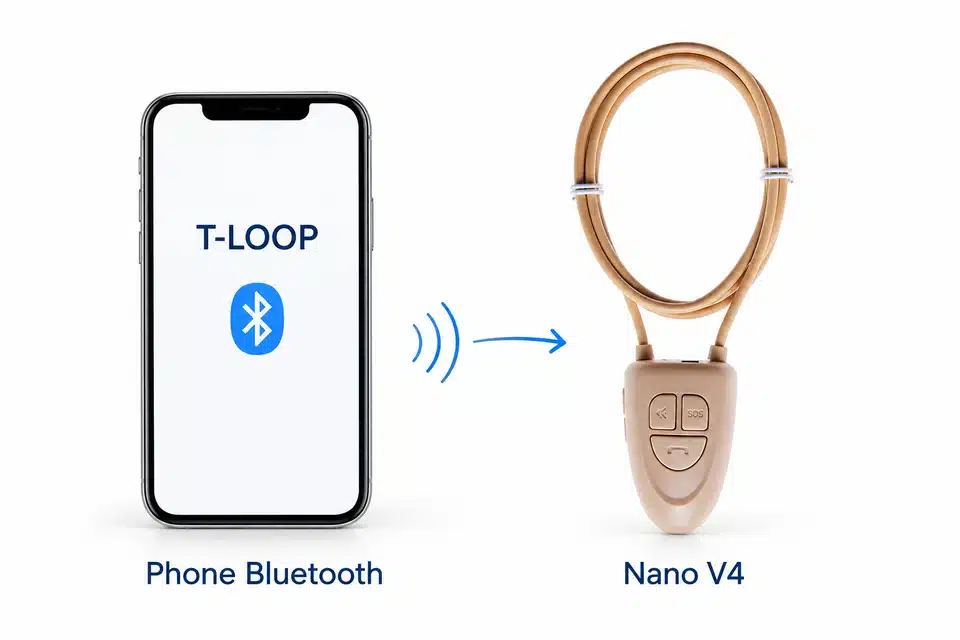
1. Check your kit and selected receiver
Check the model label. The two tiny Nano receivers are different from the larger extractor magnet and extractor bar.
- Nano V4 rechargeable Bluetooth neckloop with integrated microphone.
- Two Nano receivers, an extractor bar and an extractor magnet.
- USB charging cable and charging plug.
The current choices are Nano, Nano + Vip Pro SuperMini, Nano + Vip Pro SuperMini Beige, and Nano + Vip Pro UltraMini. A Nano + Vip Pro option adds one selected receiver and two 337/SR416SW cells. Those cells are only for that optional receiver, not for the Nano receivers or neckloop.
2. Charge and check the LEDs
- Charge the neckloop before its first use with the kit’s cable and charging plug, or a 5 V, 1 A USB supply.
- The charging connector does not sit fully inside the Nano V4 port, but clicks into place. Do not try to push it farther than its normal seated position.
- A red light indicates charging. Allow approximately one hour.
- Charging is complete when the red light changes to blue. Disconnect the charging cable before use.
Listed operation is up to four hours and depends on volume and use. The phone may display the connected neckloop’s battery percentage in its status bar or Bluetooth settings; this display depends on the phone.
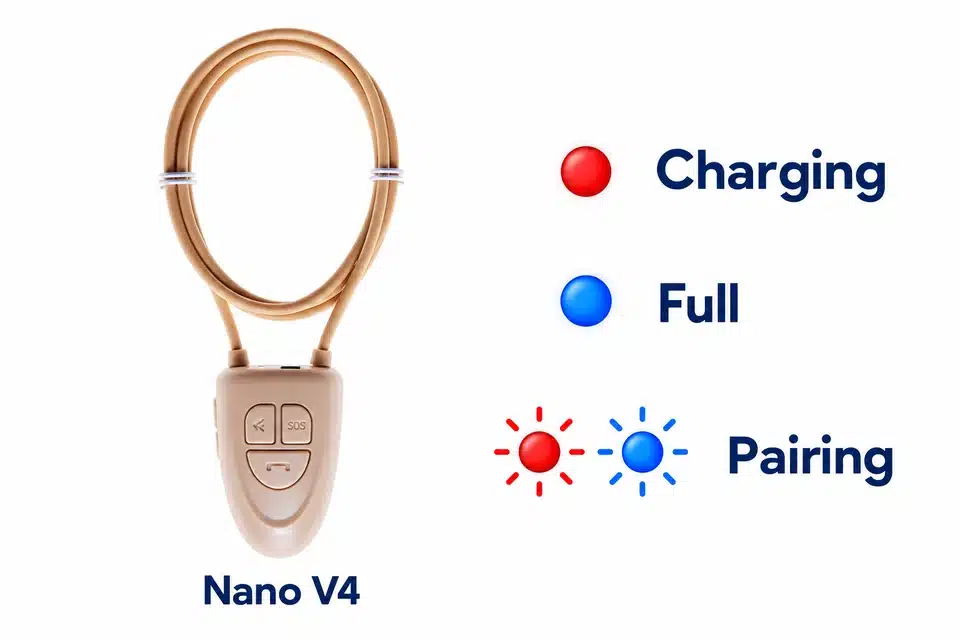
3. Power on and pair Bluetooth
- Press and hold button A (the wide lower button with the phone symbol) until the red and blue lights flash rapidly. Keep holding past the first blue light: that first light alone is not pairing mode.
- Turn on Bluetooth on the phone and search for T-LOOP.
- Select T-LOOP and pair it. The first pairing is retained for later reconnection to that phone when Bluetooth is on.
- Check that the phone shows T-LOOP connected, then select it as the output for playback or a call.
A neckloop already connected to one phone is hidden from other devices’ searches. Disconnect that phone before trying to pair another. If T-LOOP does not appear, check the rapid red/blue flashing, recharge if necessary, and toggle the phone’s Bluetooth before searching again.
4. Buttons, microphone and volume
The integrated microphone is at the top of the neckloop. Keep its opening uncovered.
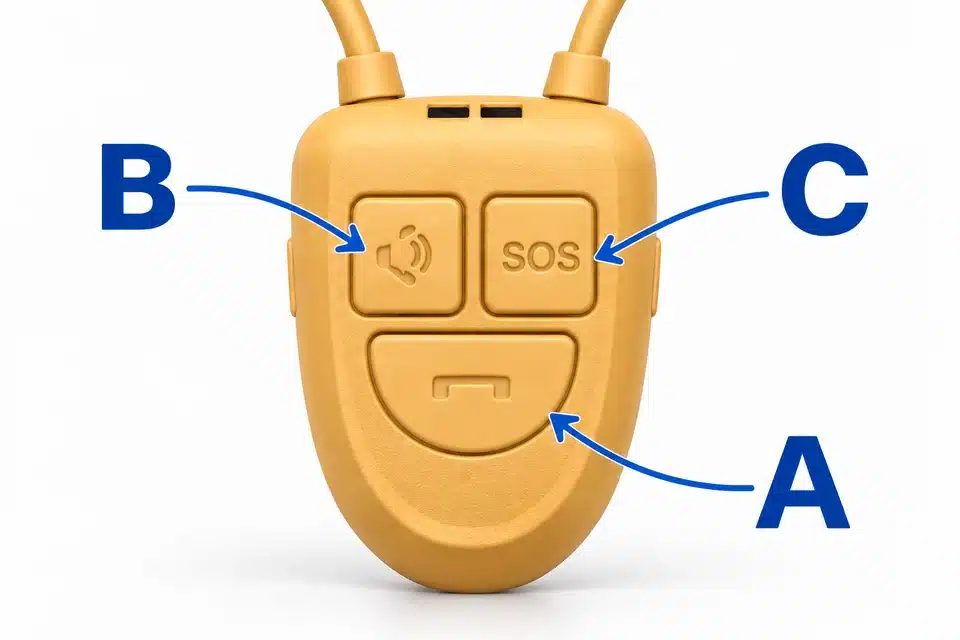
| Control | Action | Result |
|---|---|---|
| A | One click | Answer/end a call, or play/pause a recording. |
| A | Two clicks | Call the last number in the connected phone’s call log. |
| B | Press | Mute both the receiver audio and microphone. |
| C | Hold for at least two seconds during a call | Send a series of beeps. |
| + | One click | Next recording or track. |
| − | One click | Previous recording or track. |
| + | Hold | Increase neckloop volume; beeps indicate changes and a different beep marks the maximum. |
| − | Hold | Decrease neckloop volume; beeps indicate changes and a different beep marks the minimum. |
The phone and neckloop volumes are separate. Start low and use the lowest audible level. Continuous maximum neckloop volume reduces battery life. Phone and app support affect remote commands: use the phone’s controls if a command is unavailable. Avoid double-clicking A when you intend to change a track; it can initiate a call.
5. Run the tabletop audio check
- Work in a quiet room and identify the two tiny Nano receivers. Separate them if they have arrived joined; do not confuse them with the extractor magnet.
- Switch on the charged neckloop, pair T-LOOP, and play a known track from the phone.
- Place the two receivers and extractor magnet together against the neckloop on the table.
- Check for faint sound or vibration outside the ear. Increase volume gradually for this check, then return to a low level before use.
- If there is no response, check the phone’s connected output, charge, playback/mute state, and both volumes. Try another compatible phone if needed.
A tabletop response checks the audio path; it does not certify an in-ear fit or guarantee that every receiver is working correctly.
6. Optional Vip Pro receiver
This section applies only to a Nano + Vip Pro choice. A Nano-only kit has no battery to insert in its receivers.
Fit the 337/SR416SW cell
- Unscrew the optional receiver’s cap with your fingers.
- Insert one 337/SR416SW cell with the positive (+), marked face upward.
- Refit the cap carefully and check its alignment.
Check it on a table
With Bluetooth paired and a known track playing, place the receiver close to the neckloop on a table and check for sound. A hiss alone does not verify operation. For loud buzzing, remove the cell, recheck its positive-up orientation and cap alignment, and try a charged cell. Contact support if the issue persists; do not stretch the internal spring or probe sound openings with a needle.The cell drains while fitted, even without audio. Remove it after use.
7. Neckloop position, removal and storage
Wear the neckloop around the neck and keep the microphone uncovered. Keep the powered unit dry; it is not washable. Remove it from clothing before washing.The supplied Nano removal parts are the extractor bar and the larger extractor magnet. Do not insert tools into the ear canal. Account for the small receivers after use: sound loss is not proof that a receiver has been recovered.An optional Vip Pro receiver has a transparent retrieval thread. Only hold it with your fingers when already accessible, and stop if removal is not easy. Remove its cell after the receiver is out.
Do not insert cotton buds or tools into the ear canal, or push a receiver deeper. If removal is difficult, stop and get medical care. Seek urgent care for severe pain, bleeding or discharge; a battery in the ear needs immediate medical help. See Mayo Clinic: foreign objects in the ear and NHS: earwax build-up.
Clean the removed Nano receivers, extractor magnet and bar with water or isopropyl alcohol only outside the ear. Keep liquids away from the powered neckloop and allow removed parts to dry completely before storage. Ask support about cleaning an optional Vip Pro receiver; do not insert a needle.
Switch off
Hold A until the red light comes on and then goes out. Turn off after use to prevent the neckloop discharging while stored.
Fix a failed check
T-LOOP does not appear in Bluetooth search.
Hold A past the first blue light until red and blue flash rapidly. A short press is not pairing mode. Toggle the phone’s Bluetooth, recharge and search again. If the neckloop is already connected to another phone, disconnect that phone first.The kit does not work.
Charge the neckloop, pair it to the phone and repeat the known-track tabletop test. Confirm the correct Bluetooth output and volumes. Check the optional receiver’s 337 cell and positive-up orientation separately. If a part still fails, contact support; do not assume a passive Nano receiver cannot be faulty.I hear nothing or very little.
Check charge, T-LOOP connection, phone output/mute state and both volumes. Repeat the table test, then wear the neckloop around the neck for use. If using Vip Pro, check its cell and cap. Do not push a receiver deeper to fix low volume.Only one receiver seems to work.
Verify the identities of the small receivers and the larger extractor magnet, then check the audio path on the table. Check an optional receiver’s cell separately. Contact support if a receiver still does not respond; no ear-side preference or deeper placement is needed for this check.The optional Vip Pro receiver buzzes loudly.
Remove the cell, place its positive (+) face up, and align the cap without forcing it. Try a charged 337/SR416SW cell. If buzzing persists, stop using it and contact support rather than modifying the internal contact spring.The buttons do not perform the expected action.
One click and a hold have different functions. Use a single +/− click for next/previous and hold for volume. A double-click can call the last number in the phone log. Some remote functions depend on the phone or app; use the phone’s own controls when needed.The microphone does not work on a call.
Check the phone’s Bluetooth call audio setting and keep the microphone at the top of the neckloop uncovered. The integrated microphone works as a headset microphone on supported phones. If necessary, test another phone.I cannot remove the receiver.
Stop if removal is difficult. Do not insert tools, force the receiver or repeatedly attempt removal. Get medical care; severe pain, bleeding or discharge needs urgent care, and a battery in the ear needs immediate medical help.The neckloop worked earlier and has stopped.
It may have discharged after being left on. Recharge it, reconnect T-LOOP and check the volumes before repeating the table test. An optional Vip Pro cell left installed can also discharge; check the correct replacement cell.Battery life is short.
Allow the charging light to change from red to blue. Avoid continuous maximum neckloop volume; hold − to decrease it and adjust the separate phone volume to a low audible level. Switch off with A after use.Care and safety
Do not push a receiver deeper or put tools or cotton buds into the ear canal. If removal is difficult, stop repeated attempts and get medical help. Severe pain, bleeding or discharge needs urgent care; a battery in the ear needs immediate help.
Mayo Clinic: ear foreign-object guidance · NHS: earwax advice
Keep power parts dry and follow the model-specific storage and charging steps above. If equipment is damaged, stop using it and contact model support.
Get model-specific help
Tell us your selected Nano V4 receiver, phone model, light state, whether T-LOOP connects and the first playback or call check that failed. Keep passwords private.
Choose another model’s instructions