
MODEL INSTRUCTIONS
Nano V7 SIM kit instructions
Prepare a compatible Nano SIM, charge the unit while off and check a call with the built-in microphone clear. Test the SOS functions only after configuring the intended contact.
Before you start
Nano V7 SIM induction unit, integrated microphone, USB lead and your selected receiver option.
Check SIM voice service, PIN and registration before relying on the receiver audio.
1. Check your parts
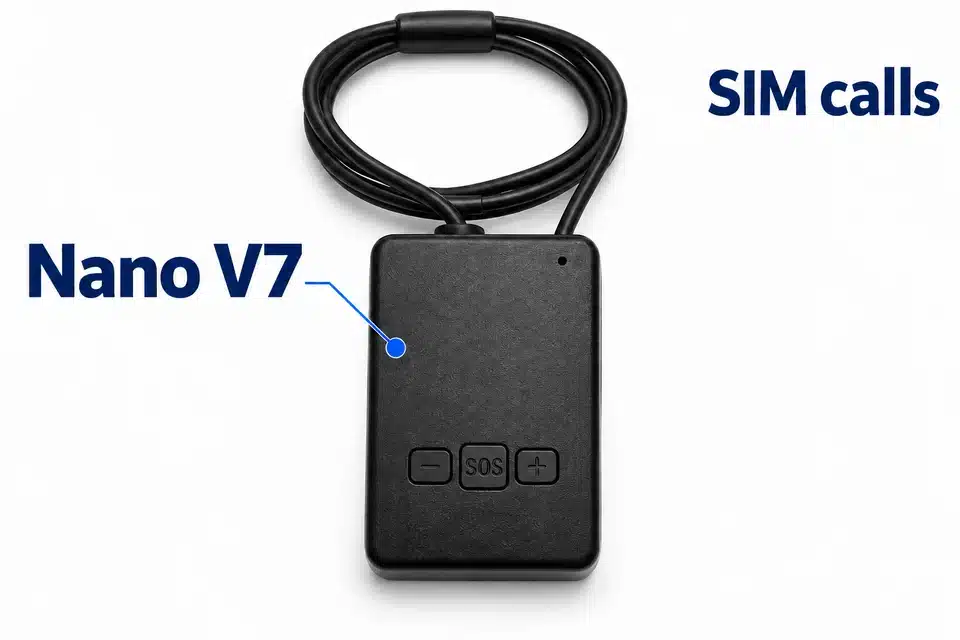
Nano V7 uses its own Nano SIM for telephone calls. It is not a Bluetooth audio kit or a microSD player. The magnetic Nano earpieces do not charge; the neckloop has the rechargeable battery.
- Two passive magnetic Nano earpieces.
- Extraction magnet and extraction rod.
- Nano V7 induction neckloop with built-in microphone.
- USB charging cable.
- If your selected order includes a Vip Pro receiver: that receiver and two listed 337/SR416SW cells. These items are conditional, not part of every Nano-only selection.
Check your selected receiver option and contents against your order before fitting any optional receiver cell.
2. Charge the induction unit
Switch the unit off
Keep the unit off while charging and when it is not in use. Use its USB charging cable with a charger rated no higher than 5V, 1A.Read the charge indicator
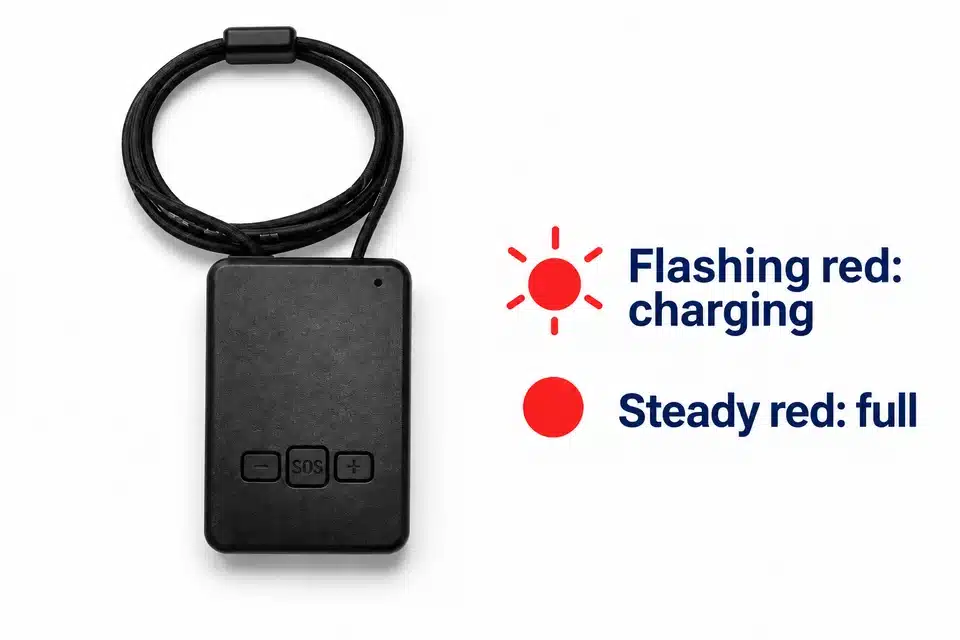
Flashing red means charging. Steady red means the charge is complete. The stated charging time is approximately 1–1.5 hours; use the indicator to check completion.
3. Prepare and fit the Nano SIM
Test the SIM in a phone
Confirm that it can make and receive calls and has coverage at your intended location. The kit requires the SIM PIN to be disabled before use; follow your phone’s SIM security settings and your network’s guidance. This is a SIM setting, not the phone’s screen-lock code.Check the network before use
The listed radio bands are GSM 900/1800 and LTE B1/B3/B5/B7/B8/B20 (2100/1800/850/2600/900/800 MHz). Ask your network whether it supports the device and telephone calls on those bands at your location. A matching band alone does not establish operator compatibility in the UK, USA or elsewhere.Fit the Nano SIM while off
Use the slot on the side of the unit. Follow the slot’s physical orientation; do not force the card. Seat it until its retaining mechanism clicks.
4. Power, calls and microphone
Press SOS briefly once to switch on. A blue light appears briefly and then goes out. A table audio test should produce the spoken start-up prompt “System ON”. The built-in microphone must remain uncovered.
| Control | Function | When it applies |
|---|---|---|
| SOS: one short press | Switch on; answer an incoming call. | Power-off state / incoming-call melody, respectively. |
| SOS: two quick presses | Call back the last incoming number. | Telephone-call mode. |
| SOS: hold for 2 seconds | Switch off; blue indicator appears briefly. | After use. |
| + : short press | Increase the volume. | While checking the audio level. |
| − : volume control | Check the exact behaviour with model support before relying on this button. | Ask support to confirm the behaviour for your exact unit. |
The module has five volume levels, with an audible beep when the level changes.
5. Configure the optional SOS contact
The SOS label is a device function, not an emergency-service or safety guarantee. Automatic answering and the configured outgoing SOS call require a contact to be set first.
Add your chosen contact
Send an SMS to the number of the SIM fitted in the kit usingadd#NUMBER#. ReplaceNUMBERwith the contact’s telephone number. The stated initial format omits the country code; if automatic answering does not work, the instructions say a numeric country prefix may be needed. Use the correct format for your country and verify the result with that contact.Check the response and behaviour
The documented confirmation text isadd sos succesess. A call from the configured contact is answered automatically after approximately 3–5 seconds. With the unit already on, one brief SOS press calls that configured contact after approximately 3 seconds.Remove the contact when required
Senddel#NUMBER#to the kit’s SIM number, using the contact number being removed. The documented confirmation isdelete sos succesess.
6. Prepare your selected receiver
Nano magnetic receiver
Nano earpieces have no receiver cell to fit or charge. Identify both small earpieces, the separate extraction magnet and the rod before the table test.
Optional Vip Pro receiver
Follow this section only if your selected kit includes a current Vip Pro SuperMini or UltraMini receiver.
Fit the receiver cell
Unscrew the cap with your fingers. Fit the listed 337/SR416SW cell with the positive (+) face upwards; the lettered face identifies this side. Carefully screw the cap back on and check its alignment.Check power on the table
A powered Vip Pro receiver may make a low static sound. Check its cell orientation and cap alignment if the sound is very loud even outside the ear. A weak or discharged cell can also stop the receiver from responding.Remove the cell after use
A fitted cell is consumed even when the transmitter is not being used. Remove it between uses. Do not confuse the receiver’s cell with the rechargeable battery inside the transmitter.
7. Test the complete kit on a table
Start with the unit off
Use a quiet room. For Nano, put the extraction magnet together with the two Nano earpieces and lay them in direct contact with the induction unit. For Vip Pro, place the prepared receiver near the induction unit.Switch on and check the prompt
Press SOS briefly. Check for the “System ON” prompt, vibration or very quiet sound. A response tests the table audio path; it does not establish correct ear placement.Check a telephone call
Call the kit’s SIM number from another phone. Answer with one brief SOS press, or test automatic answering if you have configured that caller as the SOS contact. Check the microphone in this call and adjust the unit’s audio level.
If there is no response, check the charge, Nano SIM seating, SIM PIN setting, coverage, call service and audio level. Try another compatible Nano SIM if available before contacting support.
8. Position and care for the kit
Identify the receiver and extraction parts
The extraction magnet and rod are separate from the two small Nano earpieces. The rod accepts the magnet at its base. Keep these parts identifiable; do not mistake the magnet for an earpiece. An optional Vip Pro receiver has a transparent removal thread.If fit or removal is unclear, stop and ask for model-specific guidance. Do not use sound alone to decide that a receiver has left the ear.
Position the transmitter
Wear the induction neckloop around the neck. Keep the unit and its leads supported so that the connections are not pulled.Keep the microphone opening clear of clothing and tape. The induction unit is not washable; keep its electronics and charging connection dry.Keep the neckloop around the neck and the built-in microphone exposed.After use, hold SOS for 2 seconds to turn the unit off. Remove an optional Vip Pro cell. Clean the loose Nano earpieces, extraction magnet and rod before and after use. The kit instructions list water or isopropyl alcohol for these loose parts only, outside the ear; keep these liquids away from the induction unit and its electrical connections.
Fix a failed check
A call cannot be established
Check that the SIM can make and receive calls in a phone, its PIN requirement is disabled, and it is seated with a click. Check charge and switch-on, local coverage and your operator’s support for the listed bands and voice service. Try another compatible SIM/network where possible.Automatic answering or the SOS call does not work
These functions need a configured SOS contact. Check the SMS confirmation and the stored telephone-number format; a numeric country prefix may be needed. Test with the configured contact before relying on the function.No sound, or very quiet sound
Repeat the table test with sufficient charge. Check call audio, unit volume, SIM service and transmitter position. For Vip Pro, also check the receiver cell’s charge, orientation and cap. If the table test responds but fit is uncertain, stop and contact support rather than inserting a receiver deeper.The microphone does not work
Keep the built-in microphone uncovered. Use a test call with another phone to check whether the other caller can hear you, and describe that result to support.Only one Nano earpiece seems audible
Check that both small pieces are Nano earpieces and neither is the extraction magnet. Repeat the table test. A difference in worn sound does not prove an earpiece fault or justify deeper insertion; tell support which parts responded on the table.The optional Vip Pro receiver makes a loud buzz
With the receiver outside the ear, check the cell’s positive (+) face, cell charge and cap alignment. If the sound remains excessive, stop use and contact support before adjusting internal components.I cannot remove a receiver
Stop repeated attempts and seek medical help if removal is difficult. Do not decide that it has fallen out just because there is no sound. CooMax can help identify the model and supplied extraction parts; medical care is the appropriate route for an object that cannot be removed safely.The unit worked previously and stopped
Check whether it was left on. Switch it off and charge fully using the specified charging arrangement, then repeat the SIM and table-audio checks. For storage care, the instructions recommend a charge/discharge cycle at least every three months.Care and safety
Do not push a receiver deeper or put tools or cotton buds into the ear canal. If removal is difficult, stop repeated attempts and get medical help. Severe pain, bleeding or discharge needs urgent care; a battery in the ear needs immediate help.
Mayo Clinic: ear foreign-object guidance · NHS: earwax advice
Keep power parts dry and follow the model-specific storage and charging steps above. If equipment is damaged, stop using it and contact model support.
Get model-specific help
Tell us your selected Nano or optional Vip Pro receiver, Nano V7 charging lights, System ON tabletop result and SIM voice-call/coverage test in a phone. Describe the first failed call or built-in-microphone check and any SOS-contact confirmation. Include the optional Vip Pro cell check where applicable; keep PINs and contact numbers private.
Choose another model’s instructions